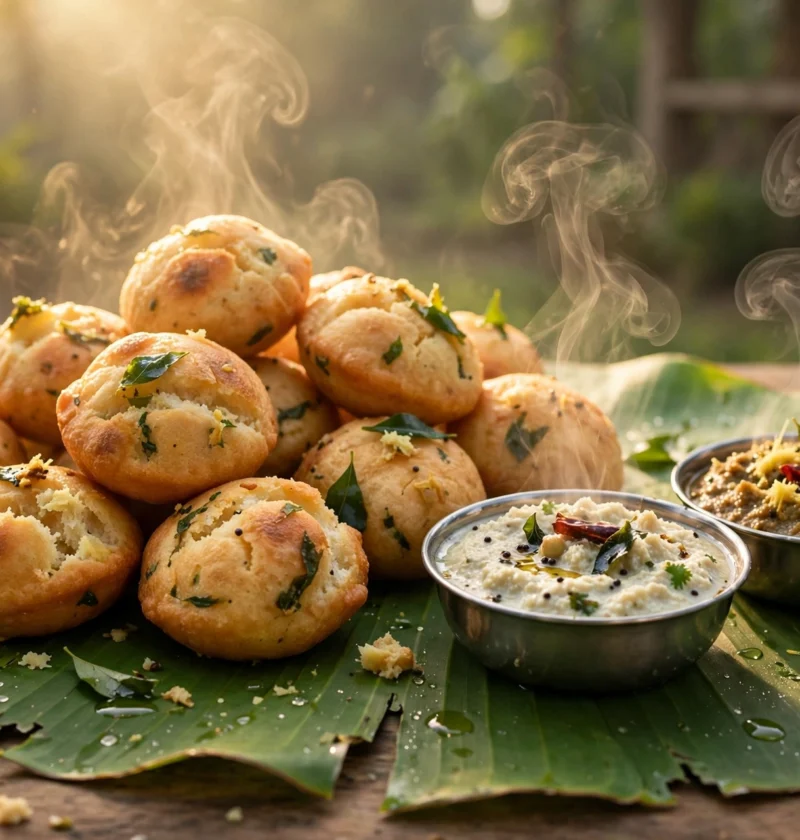
I met mysore bonda on a bus-stop morning in Bengaluru, and I had no idea what I was ordering. I had ducked into a tiffin centre to escape a sudden drizzle, pointed at the round golden dumplings behind the glass because they looked like the safest bet on the counter, and sat down with a steel plate and a steel tumbler of coffee. The first one I broke open surprised me completely. There was no filling at all, just a soft, springy crumb that gave way like a little savoury doughnut, scented with ginger and green chilli and curry leaves. I ate four before my bus came, and I have been chasing that exact texture in my own kitchen ever since. This mysore bonda recipe is the version that finally matched it, after a long run of batches that came out either too dense or too oily.
The thing that hooked me is how little this snack asks of you. There is no potato to boil, no stuffing to prepare, no batter that needs hours of fermenting. You whisk a thick maida batter with curd and a few aromatics, let it rest briefly, and drop spoonfuls into hot oil. In about thirty-five minutes you have a plate of golden, pillowy bondas that work for breakfast with chutney, for evening tea, or for a house full of unexpected guests. It has become my emergency snack, the one I turn to when the fridge is nearly empty and people are already on their way. This mysore bonda recipe never lets me down on those evenings.
Why This Mysore Bonda Recipe Works
- The curd does the leavening work. Slightly sour curd reacts with a pinch of soda to puff the batter from within, so this mysore bonda recipe turns out soft and airy without any yeast or overnight wait.
- The batter stays deliberately thick. A batter that holds its shape on the spoon fries into round, plump bondas instead of flat discs, which is why this mysore bonda recipe insists on a dropping consistency rather than a pouring one.
- Ginger and green chilli are chopped fine, not ground. Tiny pieces of ginger and chilli stud every bite with warmth and freshness, giving this mysore bonda recipe its character without turning the batter watery.
- The oil is kept at a steady medium heat. Gentle heat lets the centre cook through while the outside turns golden, so this mysore bonda recipe never gives you a browned shell hiding raw dough.
- A short rest wakes the batter up. Fifteen minutes of resting lets the flour hydrate and the soda begin its work, so the bondas puff higher than batter fried straight from the bowl.
Ingredients
You need only a handful of pantry staples here, all measured with everyday cups and spoons. The single ingredient I would pick with care is the curd. It should be fresh but slightly tangy, the kind that has sat a day past fresh, because that tang is what lifts the batter. Very sweet, just-set curd will still work, but the bondas will taste flatter.
- 1 cup all-purpose flour (maida)
- 1/4 cup rice flour
- 1/2 cup sour curd (yogurt), whisked smooth
- 1/2 cup water, plus a splash more if needed
- 1 tablespoon ginger, very finely chopped
- 2 green chillies, very finely chopped
- 8 curry leaves, finely chopped
- 2 tablespoons fresh coriander leaves, chopped
- 1 teaspoon cumin seeds
- 1/4 teaspoon baking soda
- 1 teaspoon salt, plus more to taste
- 1 tablespoon grated coconut, optional
- 3 cups vegetable oil, for frying
- Coconut chutney and ginger chutney, to serve
A note on the chillies: green chillies differ a lot in fire, so nibble a tiny piece before chopping. If yours are fierce, use one instead of two, and remember that the curd in the batter softens the heat a little. If fresh curry leaves are out of reach, skip them rather than using dried ones, which add little to this mysore bonda recipe.
Method
Step 1: Whisk the curd and water into a smooth base
Tip the whisked curd into a roomy bowl and stir in the water until the mixture looks even and lump-free. This liquid base is what the flours will drink up, so take a moment to get it smooth now rather than chasing lumps later. A smooth base means a smooth batter, and a smooth batter means bondas that puff evenly instead of splitting in the oil. Set the bowl where you have room to whisk comfortably.
Step 2: Fold in the flours and aromatics
Sift the maida and rice flour over the curd mixture and stir with a wooden spoon until just combined. The batter should be thick enough to mound on the spoon and fall off in a slow dollop, noticeably heavier than pancake batter. Now fold in the ginger, green chillies, curry leaves, coriander, cumin seeds, salt, and grated coconut if you are using it. Stir in the baking soda last, giving the batter only a few gentle turns, so this mysore bonda recipe keeps its lift instead of losing the fizz to the air.
Step 3: Rest the batter briefly
Cover the bowl with a plate and leave it on the counter for 15 minutes. During this pause the flour absorbs the liquid, the batter thickens slightly, and the soda begins to lighten the mixture. You will notice tiny bubbles on the surface when you lift the cover, which is exactly what you want to see. If the batter has stiffened too much to drop from a spoon, loosen it with a tablespoon of water and stir once. Do not over-stir at this stage, or you will knock out the air you have just built.
Step 4: Heat the oil to a gentle medium
Pour the oil into a deep kadhai and warm it over a medium flame until it reaches about 325°F, a touch cooler than you would use for crisper snacks. Test it with a pea-sized drop of batter: it should sink briefly, then rise slowly to the surface and turn pale gold over half a minute or so. A drop that browns instantly means the oil is too hot and the centres will stay doughy, while a drop that lingers on the bottom means the oil is still too cool and the bondas will drink oil. This temperature judgement matters more than any other part of this mysore bonda recipe.
Step 5: Drop, fry, and serve warm
Wet your fingers or a small spoon, scoop up a walnut-sized portion of batter, and ease it into the oil, working away from yourself. Fry 5 to 6 bondas at a time for 3 to 4 minutes, turning them gently with a slotted spoon, until they are evenly golden all over and feel light when lifted. Drain them on a rack so air circulates underneath. This mysore bonda recipe is at its best in the first half hour, when the outside still has a whisper of crispness and the inside is soft, warm, and steamy. Serve this mysore bonda recipe with coconut chutney and ginger chutney.
Serving Suggestions for This Mysore Bonda Recipe
In our house these rarely reach a formal plate. The first batch usually gets eaten standing around the stove, torn open and dunked straight into chutney while the next round is still frying, and I long ago stopped pretending otherwise. When I do manage to serve this mysore bonda recipe properly, coconut chutney is the classic companion, cool and creamy against the warm spice, with a spoonful of fiery ginger chutney on the side for anyone who wants extra punch. A steel tumbler of filter coffee beside the plate turns it into a full Karnataka breakfast.
For a crowd, spread the bondas across a banana leaf beside bowls of both chutneys, onion rings, and lemon wedges, and invite guests to serve themselves. They hold their own on a breakfast spread next to other tiffin favourites. If your table already loves our aloo bonda, serve the two together and let people compare them, the soft, hollow mysore bonda against the dense, potato-filled aloo bonda, and see which plate empties first. For a heartier breakfast spread, pair them with our medu vada, whose crisp shell and fluffy centre make a lovely contrast to these golden dumplings.
Storage and Reheating
Freshness is everything here, and I would rather be plain about it: mysore bondas are glorious for the first hour and merely pleasant after that. Still, a leftover batch is worth keeping if you treat it kindly. Once completely cool, tuck the bondas into a sealed container and chill them for a day at most, with the chutneys stored apart so moisture does not soften them further.
To revive this mysore bonda recipe, warm the bondas in a 350°F oven for 5 to 6 minutes on a tray, which restores some softness and a little of the outer colour. An air fryer at 330°F for 3 minutes works too, though it crisps the outside more than the oven does. Skip the microwave, which makes them rubbery within seconds. The batter itself keeps chilled for a day, so frying a fresh round just before guests arrive remains the cleverest way to serve them at their peak.
Mysore Bonda Recipe FAQs
What is the difference between mysore bonda and aloo bonda?
They share a name and a frying pan, but they are different snacks entirely. A mysore bonda recipe like this one is a soft, spongy dumpling made from a maida and curd batter, with no filling at all, puffed up by soda and sour curd. Aloo bonda, by contrast, wraps a spiced potato filling in a chickpea batter and fries it crisp, so it is denser, crunchier, and far more filling. If you want pillowy and light, you want mysore bonda; if you want crunchy and hearty, you want aloo bonda. Both belong to the broad family of bonda snacks, and both take their name from the city of Mysore in one case and the potato in the other.
Why did my bondas turn out flat instead of round?
Nearly always, the batter was too thin. A runny batter spreads in the oil instead of holding a ball shape, so it fries into discs. Aim for a batter in this mysore bonda recipe that mounds on the spoon and drops off slowly, and add flour a spoonful at a time if yours pours like cream. A batter that is too thick is easier to fix than one that is too thin, so err on the thick side and loosen it only if it will not leave the spoon at all.
Why are my bondas raw in the middle?
The oil was almost certainly too hot. High heat browns the outside before the centre has time to cook, which is the classic mysore bonda failure. Keep the flame at medium and the oil near 325°F, and fry a single test bonda first: break it open and check the crumb before committing the whole batch. A pale, even gold outside with a fully cooked, springy centre is the target, and patience with the temperature gets you there.
Can I make this mysore bonda recipe without curd?
You can, but the texture changes. Buttermilk thinned with a little water is the closest swap for this mysore bonda recipe, since it brings the same tang that reacts with the soda. Plain milk with a squeeze of lemon, left to sit for ten minutes, works in a pinch, though the crumb comes out a touch less airy. Whatever you use, keep it slightly sour, because that tang is what makes this mysore bonda recipe puff instead of sitting flat.
Recipe Summary
Prep: 10 minutes, plus a 15-minute rest. Frying: around 15 minutes across batches. All in: close to 35 to 40 minutes. Feeds: 4 people as a snack. Skill level: straightforward, and the oil heat is the main detail to mind. This mysore bonda recipe takes a simple maida and curd batter, a handful of aromatics, and gentle heat, and turns them into golden, pillowy dumplings that vanish faster than any snack I know. Give this mysore bonda recipe one try on a rainy morning, and I suspect it will earn a permanent place in your breakfast rotation.