The Snack That Stopped Me Mid-Bite
I still remember the evening I first tasted a proper keema kachori, because it genuinely stopped me mid-bite. It was a crowded Ramadan night on Burns Road in Karachi, the air thick with smoke from the grills, and a vendor was pulling small golden discs out of a wide karahi of oil, stacking them in a trembling tower. I bought two wrapped in newspaper and bit into the first standing right there on the pavement. The pastry shattered — not crumbled, shattered — and inside was hot, juicy mince, dark with spices, rich with onion and green chilli. I stood there with flakes down my shirt, unbothered, having found the snack I would spend years trying to recreate. This keema kachori recipe is the version that finally matched that memory, after more batches than I care to admit.
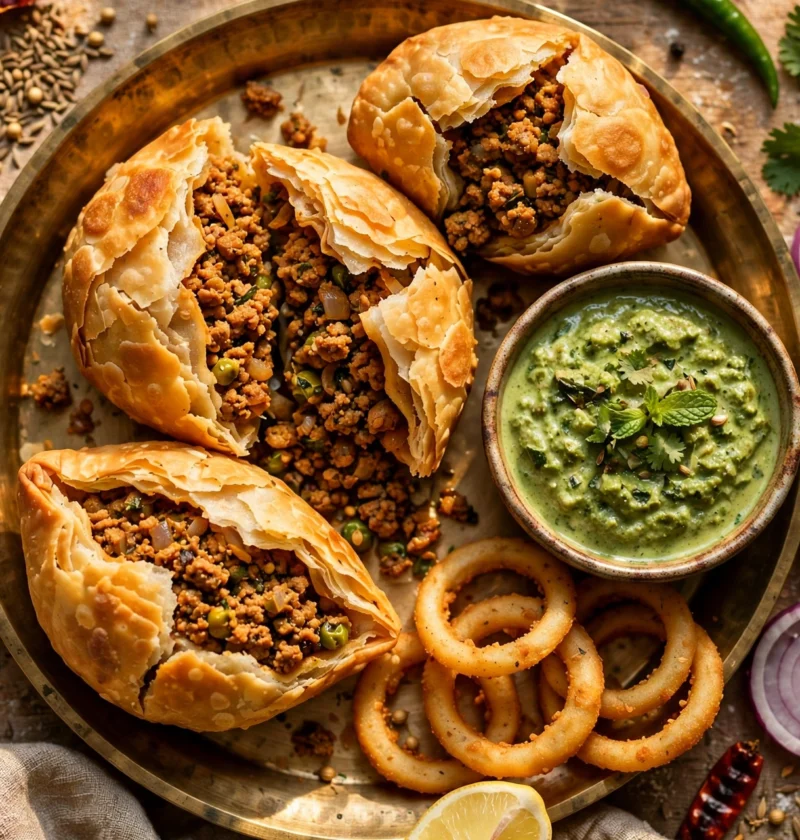
What makes this dish special is the contrast: a crisp, flaky ghee-enriched shell around deeply seasoned mince, cooked down until almost dry before it ever meets the pastry. It sounds like a project, but the method is forgiving once you grasp two things — the dough must rest, and the frying must be slow. Get those right and this keema kachori recipe gives you a platter of golden kachoris that taste straight from a street stall, and a kitchen that smells like a celebration.
Why This Keema Kachori Recipe Works
- The dough is short, not stretchy: Rubbing warm ghee into the flour before adding water gives a pastry that fries up crisp and flaky instead of chewy, which is exactly what this keema kachori recipe needs.
- The filling is cooked dry: The mince is fried until dry and the fat glistens, so it never steams the pastry or bursts the seal during frying.
- Resting does the hard work: A half-hour rest relaxes the dough so this keema kachori recipe rolls thin without springing back, and a short rest after shaping keeps the kachoris from cracking in the oil.
- Low, slow frying is the secret: Starting in moderately hot oil and puffing gradually gives an even golden crust without raw centres or burnt spots.
- It is made for sharing: One batch of this keema kachori recipe makes twelve generous kachoris, and they hold their crunch long enough to survive a trip to the table, a tea party, or a lunchbox.
Ingredients for This Keema Kachori Recipe
The list below makes 12 kachoris for this keema kachori recipe, enough for 4 to 6 people as a snack. Measure the spices ahead — the filling stage moves fast once the pan is hot.
For the pastry
- 2 cups all-purpose flour, plus more for dusting
- 1/2 teaspoon fine sea salt
- 1/4 cup ghee, melted and slightly warm
- 1/2 cup lukewarm water, plus 1 tablespoon more if needed
For the keema filling
- 1 tablespoon neutral oil, such as canola or sunflower
- 1 pound ground beef (80/20 works best)
- 1 medium onion, very finely chopped
- 1 tablespoon ginger, finely grated
- 3 cloves garlic, minced
- 2 green chillies, finely chopped
- 1 teaspoon ground cumin
- 1 heaped teaspoon ground coriander
- 1/2 teaspoon garam masala
- 1/2 teaspoon Kashmiri red chilli powder
- 1/4 teaspoon turmeric powder
- 1/2 teaspoon sea salt, plus more to taste
- 2 tablespoons fresh cilantro, chopped
- 1 tablespoon lemon juice, freshly squeezed
For frying
- 4 cups neutral oil, such as canola or sunflower, for deep-frying
How to Make This Keema Kachori Recipe in 5 Steps
The method has five stages, and the golden rule of this keema kachori recipe is patience at the fryer: gentle oil, a steady hand. Have a slotted spoon and a paper-towel-lined tray ready before the first kachori goes in.
Step 1: Make the pastry dough
Tip the flour and salt into a large bowl and pour in the warm ghee. Rub it in until the mixture looks like coarse breadcrumbs and holds when squeezed — this is the step that makes the pastry short and crisp, so do not rush it. Add the lukewarm water a little at a time, mixing until a firm, smooth dough forms; it should feel like soft modelling clay, not sticky. Knead for 4 to 5 minutes, then cover the bowl with a damp cloth and let the dough rest for 30 minutes. That rest matters: relaxed dough rolls thin without tearing, which is what this keema kachori recipe depends on.
Step 2: Cook the spiced keema filling
While the dough rests, warm the tablespoon of oil in a wide skillet over medium-high heat. Add the onion and cook for 4 to 5 minutes until soft and lightly golden at the edges, then stir in the ginger, garlic and green chillies and cook for one minute until fragrant. Add the ground beef, breaking it up with a wooden spoon, and cook for 7 to 8 minutes until browned all over. Stir in the cumin, coriander, garam masala, chilli powder, turmeric and salt, and cook 6 to 8 minutes more, stirring often, until dry and the oil glistens around the pan’s edges. This keema kachori recipe depends on that dryness, so do not stop while the filling still looks wet. Take it off the heat, stir in cilantro and lemon juice, taste for salt, and cool completely — warm filling melts pastry and breaks seals.
Step 3: Divide the dough and the filling
Turn the rested dough onto a lightly floured surface and divide it into 12 equal pieces, rolling each into a smooth ball. Do the same with the cooled filling, dividing it into 12 equal portions — patting the filling into a rough rectangle and cutting it into 12 squares keeps portions even. Cover dough and filling with a cloth so nothing dries out while you work. Even portions matter more than perfect shapes here, because a kachori with too much filling bursts and one with too little tastes like plain bread, and this keema kachori recipe is at its best when every kachori is generously stuffed.
Step 4: Stuff and seal each kachori
Take one dough ball and flatten it into a disc about 3 inches across, keeping the centre slightly thicker than the edges — this is the opposite of how you roll a roti, and it is what keeps the base from splitting. Place filling in the centre, gather the edges up and over it like a small pouch, and pinch firmly to seal. Turn the pouch seam-side down and press gently with your palm into a flat disc about 3 1/2 inches across, taking care not to press so hard that the filling pokes through. Repeat with the rest, keeping finished kachoris covered with a cloth. Rest them 10 minutes before frying so the seals hold, a small step this keema kachori recipe rewards.
Step 5: Fry low and slow until golden
Pour the frying oil into a deep, heavy pot or karahi and heat it over medium heat until it reaches about 300°F — if you do not have a thermometer, drop in a tiny scrap of dough; it should sink, then rise slowly with gentle bubbles, not sizzle violently. Slide in 3 to 4 kachoris at a time, seam-side down first, and fry for 5 to 6 minutes, turning them once or twice, until they puff slightly and turn a deep, even gold. Low heat cooks the pastry through without scorching, which is the whole frying philosophy of this keema kachori recipe. Lift them out with a slotted spoon, drain on paper towels, and fry the remaining batches the same way, letting the oil come back to temperature between batches. Serve warm, while the pastry is at its crispest.
Serving Suggestions
The classic way to serve this keema kachori recipe is simple: a pile of hot kachoris with mint chutney and tamarind chutney for dipping, plus sliced onions and lemon wedges on the side. The chutneys’ tang cuts the pastry’s richness, and raw onion adds a crunch the whole plate needs. For a fuller table, add yogurt whisked with salt and roasted cumin as a cooling dip for anyone who finds the green chillies too lively.
If your guests love stuffed breads, this keema kachori recipe sits happily next to other favourites — a plain Kachori for the purists at the table, or, when there is leftover mince, a quick Keema Pav the next day so nothing goes to waste. For a street-style chaat twist, crush one warm kachori onto a plate, spoon over yogurt, both chutneys, chopped onion and a handful of sev, and hand everyone a spoon. And make tea: strong doodh patti is the non-negotiable partner to anything fried and golden.
Storage and Reheating
Unfried, shaped kachoris keep well: arrange them in a single layer on a tray, cover tightly, and refrigerate for up to 24 hours, or freeze for up to a month and fry straight from frozen, adding 2 minutes to the cooking time. Fried kachoris are best the day they are made, but leftovers keep in an airtight container at room temperature for a day, or in the fridge for 2 days — the pastry softens, though the flavour stays good. To bring back the crunch, reheat them in a 375°F oven for 8 to 10 minutes on a wire rack, which works far better than the microwave. The microwave makes them chewy, so I use it only in a real hurry. The cooked filling alone refrigerates well for 3 days and freezes for a month, which means a second batch of this keema kachori recipe is never far away.
Frequently Asked Questions
Can I bake or air-fry these kachoris instead of deep-frying?
You can, and they still taste good, though the texture changes. For the oven, brush the kachoris generously with oil and bake at 400°F for 20 to 22 minutes, flipping once, until golden. For the air fryer, brush with oil and cook for roughly a quarter of an hour at 375°F, turning once midway. Both come out crisp but not as shatteringly flaky as deep-fried ones — that texture comes from frying in oil. If you are watching the oil, the air fryer is the better compromise of the two, and this keema kachori recipe adapts well to either method.
Why do my kachoris burst open while frying?
Almost always, one of three things happened: the filling was still warm when it was sealed, the seal was not pinched firmly enough, or the oil was too hot. Warm filling softens the dough, a loose seal opens as the steam builds, and very hot oil makes the pastry puff too fast for the seal to hold. Let the filling cool completely, pinch the pouch shut and then press it flat seam-side down, and keep the oil around 300°F — the same three rules this keema kachori recipe repeats for a reason. If one does burst, lift it out quickly — it will still taste wonderful, just less photogenic.
Can I use chicken or lamb mince instead of beef?
Yes, both work with the same spices. Chicken mince is leaner and cooks faster, so add a tablespoon of ghee while it cooks to keep it juicy, and stop once it is dry rather than browning it hard. Lamb mince needs no extra fat; it makes a heavier, more festive kachori for a dinner gathering. Whichever you choose, the rule of this keema kachori recipe stays: cook until dry, cool fully, then fill.
Can I make the dough or filling ahead of time?
Absolutely — this is how I handle it when guests are coming. The dough can be made a day ahead, wrapped tightly and refrigerated; bring it to room temperature for 20 minutes before rolling, or it will crack. The filling keeps 3 days in the fridge and freezes beautifully for a month; thaw overnight in the fridge. With both parts ready, shaping and frying takes under half an hour, which makes this keema kachori recipe a genuinely practical party snack.
Recipe Summary
Count on 20 minutes of prep, 30 minutes of resting and about 25 minutes of frying, putting this keema kachori recipe on the table in roughly 1 hour 15 minutes. A serving of two lands near 420 calories; the batch serves 4 to 6 as a snack.
If you give this keema kachori recipe a go, I hope the first crackle takes you straight back to a crowded food street — that is the whole point, a small golden parcel of celebration from your own kitchen. For more background on the pastry behind it, read about kachori and minced meat on Wikipedia.