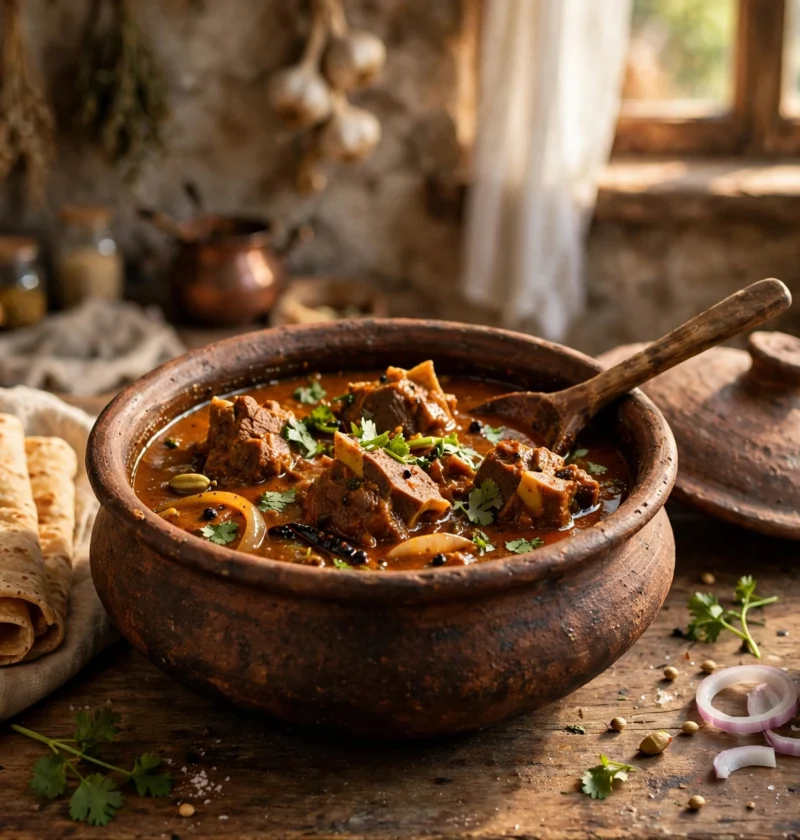
The Mutton Curry That Ended My Sunday Arguments
Every Sunday in my house used to come with the same argument, and this mutton curry recipe is the peace treaty that finally ended it. My father wanted the curry thick enough to scoop with bread, my mother wanted it loose enough to pour over rice, and I just wanted the meat to fall off the bone without a fight. For years our Sunday pot was a compromise nobody loved: either too dry, too thin, or with meat that needed a knife and a prayer. Then one winter afternoon, while my uncle was visiting from Lahore, he stood over my stove, tasted my gravy, and told me I was rushing the onions. That single sentence changed everything about how I cook this dish.
What he showed me was not a secret ingredient or an expensive spice, but patience in the right places. Onions cooked low and slow until they melt into the oil, tomatoes added only after that base turns sweet, and mutton simmered gently until the bones give up their flavour to the gravy. That is the whole philosophy behind this mutton curry recipe: no shortcuts at the start, no hurry at the end, and a pot that rewards you for leaving it alone. It takes about ninety minutes from the first onion to the table, feeds four people generously, and the result is the kind of curry that makes everyone at the table stop arguing and start reaching for seconds.
Why This Mutton Curry Recipe Works
- Onions cooked to melting point: Frying the onions slowly until they turn deep golden and collapse into the oil builds the body of the gravy, which is why this mutton curry recipe tastes rich without a spoonful of cream.
- Bone-in meat does the heavy lifting: Bones release collagen and marrow as they simmer, so this mutton curry recipe gets a naturally silky, full-bodied gravy that boneless meat can never quite match.
- Spices bloomed in oil, not dumped in water: Toasting the ground spices in hot oil for a minute wakes up their aroma and removes any raw edge, giving this mutton curry recipe a warmth that sits deep in the gravy instead of floating on top.
- Tomatoes added at the right moment: Waiting until the onions are fully golden before adding tomatoes lets their sharpness mellow into sweetness, so this mutton curry recipe finishes balanced rather than sour.
- A slow, covered simmer finishes the job: Ninety minutes of gentle bubbling turns even a tougher cut tender, which makes this mutton curry recipe forgiving enough for a first-time cook and a weeknight cook alike.
Ingredients for This Mutton Curry Recipe
This batch makes four hearty servings, with enough gravy left over to be worth saving. Ask your butcher for bone-in mutton cut into medium pieces, shoulder or leg both work beautifully, and do not trim away all the fat — a little fat melting into the gravy is what gives the finished curry its shine. Use a heavy pot with a tight lid, because a thin pot will scorch the onion base before it ever gets sweet.
For the curry
- 2 pounds bone-in mutton, cut into medium pieces
- 3 tablespoons oil or ghee
- 2 large onions, thinly sliced
- 1 tablespoon ginger paste
- 1 tablespoon garlic paste
- 3 medium tomatoes, finely chopped
- 2 green chilies, slit lengthwise
- 1 cup warm water, plus more as needed
- Salt to taste
For the spice blend and finishing
- 2 teaspoons Kashmiri red chili powder
- 1/2 teaspoon turmeric
- 1 tablespoon ground coriander
- 2 teaspoons ground cumin
- 1 1/2 teaspoons garam masala
- 1/4 teaspoon cracked black pepper
- 1/4 cup fresh coriander leaves, chopped
- 1 tablespoon lemon juice
How to Make This Mutton Curry Recipe in 5 Steps
The cooking breaks down into five stages, and the one people rush is the onion base. A pale, hurried onion gives a pale, hurried gravy, while an onion taken slowly to deep gold gives you a curry that tastes like it simmered all day. Get that base right and the rest of this mutton curry recipe practically cooks itself.
Step 1: Brown the onions low and slow
Heat the oil in a heavy pot over medium heat and tip in the sliced onions along with a good pinch of salt. Stir them every few minutes and let them cook for twelve to fifteen minutes, lowering the heat if they start to catch. You are looking for a deep golden colour and onions so soft they are beginning to fall apart — not browned crisps, and definitely not pale and crunchy. This patient onion base is the backbone of the whole mutton curry recipe, because the gravy will only ever be as good as the onions it starts from.
Step 2: Build the masala base
Add the ginger and garlic pastes to the golden onions and fry for two minutes until the raw smell disappears. Stir in the red chili powder, turmeric, coriander powder, and cumin powder, and let them sizzle in the oil for about a minute — you will smell the moment they turn fragrant and nutty. Now add the chopped tomatoes and green chilies, and cook, stirring often, until the tomatoes break down completely and the oil begins to separate at the edges of the masala. This separation is your signal: the base is cooked, and it is ready for the meat.
Step 3: Sear the mutton in the masala
Turn the heat up to medium-high, add the mutton pieces, and toss them through the masala until each piece is well covered. Let the meat sear for eight to ten minutes, turning the pieces now and then, until the outside firms up and the masala clings to it in a thick, dark coat. This searing step matters more than it looks: it seals flavour into the meat and lets the spices toast against the surface of the mutton, which is what gives this mutton curry recipe its depth instead of a thin, boiled taste.
Step 4: Simmer gently until tender
Pour in the warm water, scraping up any browned bits from the bottom of the pot, and bring everything to a gentle boil. Put the lid on, turn the heat down to the lowest setting that keeps a lazy bubble going, and walk away for sixty to seventy minutes. Stir every fifteen minutes or so, adding a splash of warm water if the gravy gets thicker than you like. The curry is done when a piece of meat yields easily to a fork and the gravy coats the back of a spoon. Taste for salt at this point, not before — salt added too early can toughen the meat in this mutton curry recipe.
Step 5: Finish with garam masala and lemon
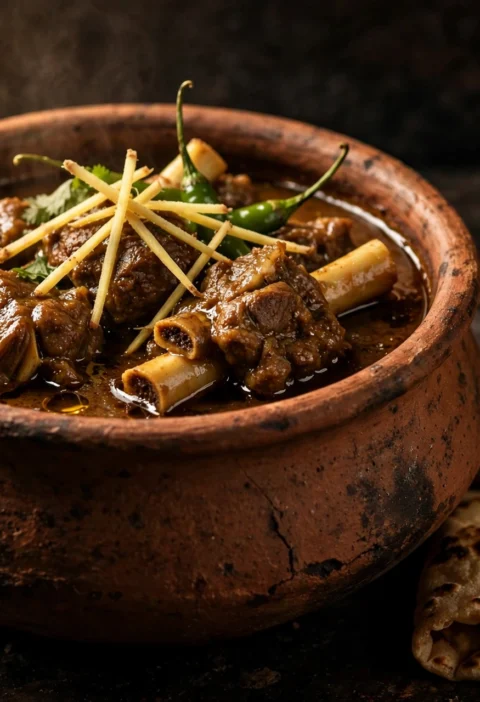
Take the lid off, stir in the garam masala and black pepper, and let the curry bubble uncovered for five minutes so the gravy tightens to the consistency you want. Turn off the heat, squeeze in the lemon juice, and scatter the chopped coriander over the top. Let the pot rest for ten minutes before serving; the gravy settles, the flavours marry, and the first spoonful tastes noticeably better than it did straight off the flame. That short rest is the final, quiet step of this mutton curry recipe, and it is worth every minute.
Serving Suggestions
My favourite way to serve this curry is family-style, straight from the pot, with warm naan for scooping and a plate of sliced onions and lemon wedges on the side. The bread lets you chase every last bit of gravy, and the sharp raw onion cuts through the richness in a way that keeps you going back for more. A simple cucumber raita alongside cools the palate without competing with the spices.
When the table is full, I like to put this curry out next to its spicier cousins so everyone can compare. My Mutton Karahi brings the fast, high-heat, tomato-forward version to the same meal, while my Rogan Josh offers the Kashmiri, slow-braised alternative — and this mutton curry recipe sits between them as the everyday home-style classic, the one that suits rice and bread equally. A pot of steamed basmati rice and a green salad round the meal out without any extra fuss in the kitchen.
For a weeknight, this curry is just as happy over plain boiled rice with a fried egg on the side, or spooned into a wrap with pickled onions for lunch the next day. It also makes a generous centrepiece for guests: double the batch, keep the pot on the lowest heat, and let people help themselves. This mutton curry recipe scales without any drama, as long as you use a wider pot and give the onions their full time.
Storage and Reheating
Like most slow-cooked curries, this one improves overnight in the fridge, as the spices sink deeper into the meat while it rests. Keep any leftover curry in a sealed box in the refrigerator for up to 4 days; the gravy will thicken as it chills, which is perfectly normal. To reheat, warm it slowly in a covered pan on the lowest flame, loosening it with a little water, and stir now and then until it bubbles softly — avoid a hard boil, which can make the meat stringy.
For longer storage, this curry freezes beautifully for up to 3 months. Cool it completely, pack it into freezer-safe containers in single-meal portions, and thaw overnight in the fridge before reheating. I do not recommend microwaving a full portion from frozen, since the meat heats unevenly and dries out at the edges. Freeze it in the gravy, never dry, and every reheated bowl of this mutton curry recipe will taste nearly as good as the day it was cooked.
Frequently Asked Questions
Which cut of mutton is best for this curry?
Shoulder is my first choice because it has the right mix of meat, fat, and bone, and it turns meltingly tender with a slow simmer. Leg works well too, though it can be slightly leaner, so keep an eye on the water level. Avoid very lean, boneless cuts for this mutton curry recipe — without bones and a little fat, the gravy loses the body that makes it special.
Why is my gravy thin even after simmering?
Almost always, the onions were undercooked or the lid was left off too early. Onions that only soften, rather than melting to gold, never thicken a gravy properly. The other common cause is adding too much water at once; add it in small splashes instead, and finish the last five minutes uncovered so the gravy tightens. A properly reduced finish is what gives this mutton curry recipe its spoon-coating richness.
Can I make this mutton curry in a pressure cooker?
Yes, and it is a fine shortcut when time is short. After searing the meat in the masala, add the water, close the cooker, and cook for 4 to 5 whistles on medium heat, then let the pressure release naturally. Open the pot, stir in the garam masala and lemon, and simmer uncovered for a few minutes to adjust the gravy. The flavour will be very close to the slow version of this mutton curry recipe, though the onions will not have quite the same melted sweetness.
Can I make this curry less spicy?
Easily. Halve the red chili powder and skip the green chilies, and the curry stays warm and flavourful without heat. The garam masala and black pepper still give it plenty of character, and a spoonful of yogurt stirred in at the end softens the spice further. This mutton curry recipe is built to bend to your table, so season it for the people eating it, not for tradition.
Recipe Summary
Allow fifteen minutes for the onion base, about ten minutes of searing, and a gentle hour-long simmer, and four people are eating in roughly ninety minutes. Each serving comes in around 480 calories, and this dish has claimed its spot in my kitchen as the Sunday pot that ended the arguments — rich, tender, and gone far too quickly.
If you try it, I hope that first gravy-soaked bite shows you why a slow onion and a patient simmer beat every shortcut I ever tried — deep, homely, and worth the wait. For the background on the dish, read about mutton curry and the wider story of curry on Wikipedia.